Showing posts with label Sparkly Pink Romantic Dress. Show all posts

August 5, 2016

Romantic Redux

For a woman who wore a buzz cut for 4+ years, I have become more than a little obsessed with 1830s hair.


While staring down the gauntlet of a rapidly approaching Costume College weekend, I realized that I simply wasn't in the mood to run myself ragged trying to finish new outfits. Instead, I focused on spiffing up some old ones with fabulous hair and accessories.

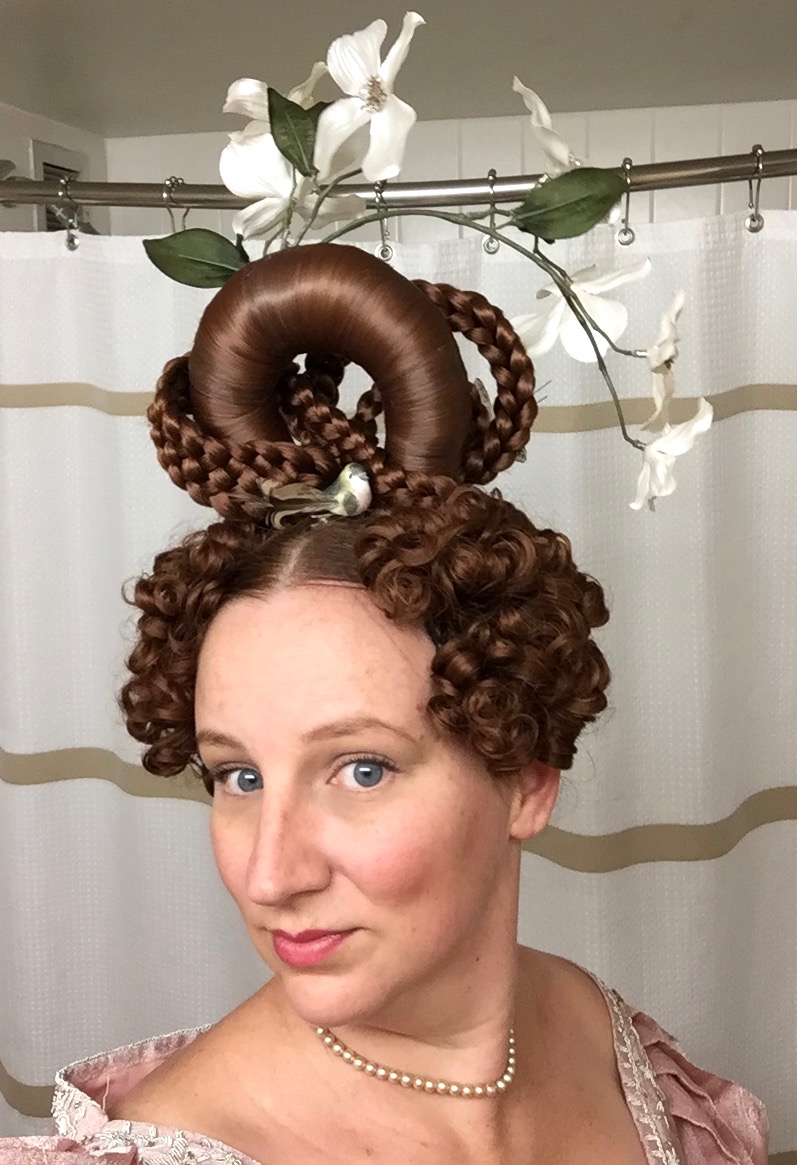
Like many historical costumers, I used to loathe the 1830s. Since then, I've figured out the secret: go big or go home. If you're attempting to out-ridiculous the original Romantic era, you're pretty much doing it right. The 1830s simply do not accept any sort of half-assing it.

Like you wouldn't make this exact face.

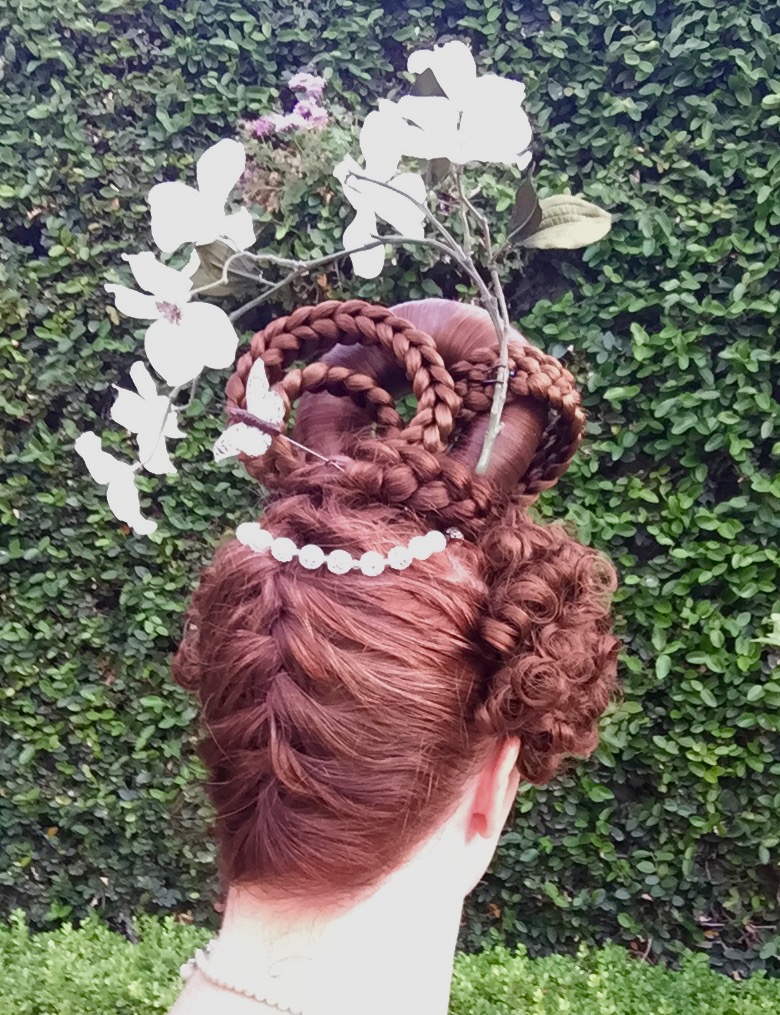
Apologies are in order, because I didn't take a single photo of the construction of the hair pieces. It was based it on this fashion print. I carved down a styrofoam disk to form the ring structure, then wrapped 24" hair wefts around it. A touch of glue at the end of each weft was enough to keep the hair in place. The ring is stitched to a buckram base so that I have a way to bobby pin it to my head. The rest is just various 3 and 6 strand braids arranged in various loops, also stitched to the base, or to the ring as needed. I clipped the buckram base down as closely as I could, then pinned it atop my head. I French-braided my own hair from the nape of my neck upwards, then wrapped my braid around the base to disguise the join.

I'm taking it off here, but you get the idea.

While I usually use my own hair for the front curls that are so common in this era, this time I purchased two of these bang extensions and curled them up ahead of time. SO MUCH EASIER. I'm never using anything else again.

From there it was simply a matter of adding flowers, a butterfly, and a bird. If anything, there's not enough STUFF in it. I need to add more ribbons and flipperies. The 1830s did not skimp.


I've also come to accept that I may have been a bit harsh on the pink dress in my last post. I wore it again with a few improvements for the 2016 Costume College Gala and fell in love with it for the first time since I made it. The inside may still be a hot mess, but the outside is looking good!


To be fair, when I originally made this dress two years ago, it was a last minute compromise. I needed an 1830s frock for an event, but  knew I didn't have time or cash to make the dress I wanted. I threw this together in less than a week. I used a reject sari that had moldered in the stash for years because it turned out to be super synthetic and the complete opposite of what I thought I had bought. The sleeves were the first wearable prototype of a pattern I was trying to create, and fell short of the mark I was aiming for. I took every shortcut I could while making the dress; the seams were so badly finished that it barely survived its first outing. On its debut there was no sash, not enough petticoats, and my hair was kinda sad; all of this contributed to my dislike of the dress.

Even when I fixed some of the shortcomings, added a sash, better hair and wore the much improved version out this last spring, I couldn't shake the disappointment that accompanied its first outing years previously. Though the dress was vastly changed, that original discouragement carried over to my post about it.

Flash forward to this last weekend: I made a new bum pad that worked wonders, re-vamped my Ugly Puffer (see HistoricalGarment's instagram photo of American Duchess and my scandalously unhistorical puffers) and worked up that FAB new hairdo. The low hotel lighting mellowed the shiny metallic-poly shine of my sari into a lovely soft sheen. I listened to my friends, who loved the dress (thanks again Lauren!). I forgave my sleeves for not holding the sharp pleats I originally ironed into them, and simply reveled in the ridiculousness of the poofy wonderfulness.  AND IT WAS AWESOME.

The sash, undergarments, hair and
ATTITUDE make all the difference.

Sometimes a few tweaks are all it takes to turn a disaster into a success. Sometimes it takes a while to move past perceived shortcomings. Sometimes you've got to just let it go.

And sometimes you just need really fucking awesome hair.

March 10, 2016

Romantic Era Confections

Big floofy sleeves? Check. Sari fabric? Check.


Even though sewing errors doomed my attempt to finish the 1890s dress in time for last weekend's ball, I still wanted to go. Trouble is, I didn't have anything from the later end of the Victorian spectrum, so I decided to dig out something from the closet that was similar to what I'd been working on (sari fabric! giant sleeves!) only from the opposite end of the Victorian era. It's a good thing PEERS isn't overly picky about sticking to the costuming theme!


Remember this old pink romantic thing from two years ago? Turns out that it was such a rush job, I never showed you what it looked like after I finished it! I originally threw it together in a week, and it shows. While it will never be anywhere near decent quality, I was able to patch it back together enough for another outing.

They look great before you try to move in them...

The fancy pleated sleeves were one of my early (failed) experiments to recreate those glorious origami confections from that pink romantic era LACMA dress we know and love. These days (and many, many iterations later) I'm much closer to a viable repro sleeve, but at the time this was as close as I could get. They're not full enough, they collapse and pull weirdly, and there's some funkiness with the shape of the underarm portion, but unless you've got your nose in my armpit they look decent for a first wearable try.


Of course, the damn things ripped right out at the underarm during the original wearing, so I sewed in some hasty gussets to give me a little more range of motion. I also mended some other tears, tacked down some bits that never got properly sewed in the first place, and patched the areas where the fabric had frayed so much it had disintegrated.

By range of motion, I mean my right arm can
go about two inches higher that this, tops.

I added a silver silk taffeta sash and bow- something that the original outfit sorely lacked. For whatever reason, the sash takes it from eh-just-some-random-nonspecific-fancy-dress to 1830's hell YEAH.

While the pink dress is fun to wear but is still a bit of a hot mess even with repairs, my hair game for the ball was SPOT ON.

This is the end of night somewhat squashed
version, and it is still EPIC.

Mind you, just before I started my hair, a big storm blew out our power. This was all done by the light of a camp lantern!


To make it even more challenging, I had to find a way to take this towering monstrosity through ferocious rain and wind to get from the house to the car, and car to the venue. The paper bag I used as a shield wasn't quite up to the task, but my hair made it mostly safe and sound. Shoes, not so much...

My front curly sections were quite high and bouncy to start, but after wind, rain, and hours of dancing and sweating, they lost their buoyancy. After the ball I experimented and discovered that I could pin up the bottom-most tails to revive the original look, so that's something I'll keep in mind for next time.

Sad, floof-less curls by the end of the evening.

Floof revived!

All in all, the dress was a sparkly, fun bit of nonsense to wear again, the hair was a great conversation piece, and the night was a success. I love the ridiculous 1830's, so you'll be sure to see more floofy sleeves here in the future!


One last thing before I bail- I've got another bustle article up at Your Wardrobe Unlocked, and this one comes with a free pattern! It's a complete how-to on making a lobster tail bustle with removable bones. Even better, the pattern is not just multi-sized, it's also designed to let you swap out the bustle pattern piece so that you can go bigger or smaller as needed. Go have a look!

April 21, 2014

All That Glitters


I realized last month that I didn't have the time/money to really splurge and make the intricate silk Romantic Era dress that's been lurking in my brain, and would have to change my plans a bit.  I still wanted something ridiculous and over the top though, so I raided my stash of saris for something obnoxious and awesome.  Problem is, most of the saris I have are so beautiful I'm still afraid to cut into them!  Luckily I found a pink one that I mostly like, but am not so in love with that can't hack it into bits without too much worry.


The sari was sold as "tissue silk", which sounds soft and lovely, but apparently means a loose, coarse weave with a weird stiff drape.  The weave is open enough that its effectively see-through.  It's got a floral brocade-style design woven into it that you can sometimes see in various lights.  It also looks extremely shiny in a super synthetic way, which was really off-putting when I first saw it in person.  However, it does have the most beautiful metal embroidery work on it, so I've been looking for something to do with it.

It's weirdly shiny and kinda stiff.

Despite the "silk" description I was convinced that it was entirely made out of some weird poly fabric due to the super shine and strange hand, but it turns out I was only half right.  On closer inspection it's a cross weave, with a pink synthetic thread in the warp and a silvery metal thread in the weft, which is what gives it that strange shimmer!

Threads separated

Close up of pink and silver cross weave.

I'm fairly anti-synthetic fabric when sewing for myself, but I figured I'd make an exception this once.  I can always call it my Glinda-the-good-witch-meets-the-1830's dress!  So far it's turning out well, despite the fabric handling oddly and being a general PITA to deal with.

Lining up the embroidery with the neckline.

Since the metal embroidery work is hands down the best part of this sari, I'm making sure it gets featured wherever possible.  I'm placing the bulk of the embroidery at the neckline, which was relatively easy on the back, but a little harder to get to work on the front pieces.  I managed it by criss-crossing the front, but had to change the shape of the neckline and cut the shoulders down a bit to make it work. 


I'm still working on getting the darts right.  Generally I don't cut them out like above, but I had to here b/c there was actually more of the fashion fabric to dart than the lining, and in order to get the two to play nice together it was easier to just cut it up.  The darts are also waaay too low right now, but I'm still trying to figure out how to raise them when I'm running into the embroidery on the right side.

Dart placement way too low; I've since raised it but still need to go higher.

I've still got to finish tweaking the bodice, figure the skirt out and finish solving the mystery of the pleated sleeves from that pink LACMA dress (nearly there!).  I'm also going to need a corded petticoat and some tucked petticoats, and to figure out how on earth I'm going to make a slightly shaggy mohawk into a proper 1830's hairdo.

The back is looking pretty good though!

I've got a week.  Let's do this...