Showing posts with label Antiques. Show all posts

August 23, 2013

A Tale of Brass and Ketchup

I'm not dead yet!  While I've got quite a bit to catch up on, I figured I'd do up a quick and dirty post on one tiny thing I actually accomplished this week.  And since I don't have the time to write a bunch of words, you get a PHOTO STORY!


This machine is in terrible shape.  But look at that cool round access plate in back!


Let's take it off!


Well shit, that looks pretty nasty and beat up.


Hmmm... all I have on hand is some chrome polish; let's see if that does anything.


Nope.

Hey, this is probably steel plated with brass, yeah?  That's probably rust that got to the steel through the worn off brass, right?  Let's drown it in Evapo-Rust!


Huh, still there.  Soooo, not rust then?


Wait, if a magnet won't stick to it, it must be solid brass!  That's not rust, it's tarnish and verdigris!  We need KETCHUP!


Well that helped somewhat, but looks like there's just too much damage for ketchup to handle on it's own. 


Time to bring out the big guns.   Go, hot vinegar, go!


Excellent; now all we need is a little elbow grease!  HAHA, forget elbow grease, we have a DREMEL and POLISHING TOOLS!


Well wouldja look at that!


WHADDA YA MEAN WE STILL GOTTA CLEAN THE REST OF THE MACHINE?

February 13, 2013

Repro Chonies Complete!

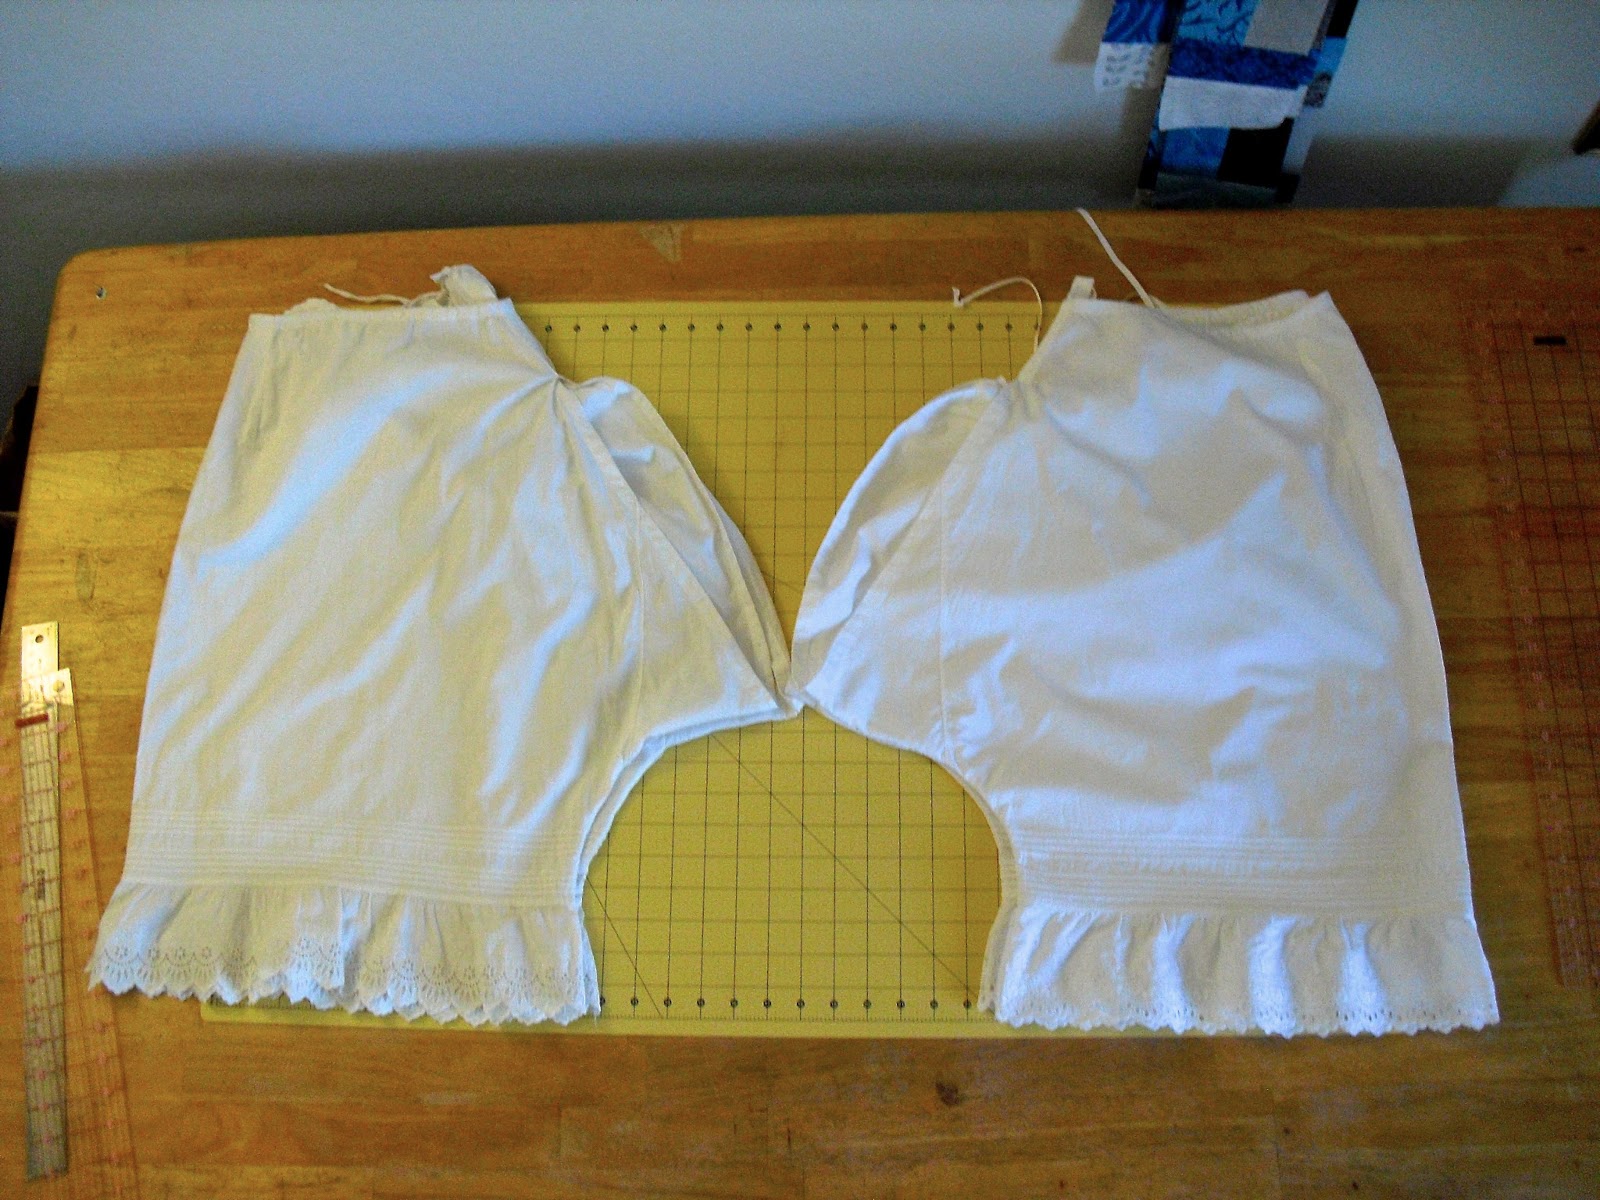
Original drawers on the left, reproduction on the right.

They're finally finished!  I've been working on reproducing a pair of antique drawers in my collection as exactly as possible, both for myself and to create a pattern to share.  As you can see from my post with lots o' closeups and analysis of these original antique late Victorian open crotch drawers, they're much more complicated than we generally consider utilitarian undergarments to be.  It's taken me a while to get the pattern and the repro just right, but now the drawers are done and there's just a few tweaks left to make on the pattern.  Conveniently, these also doubled as my project for the last Historical Sew Fortnightly "Under it All" challenge.

Originals on the left, repro on the right.

@#%^&$%! pintucks

The original pair boasted tiny 1/8" pintucks and ridiculous 1/8" flat felled and french seams.  Piecing, facings and darts galore were included.  The end result is a very sturdy pair of undies that can withstand repeated washings and abuse.

Repro lookin' awkward on a dummy with no legs

This is my second attempt at making a copy, and it went much better than the first.  It still took an insanely long time to complete all the tiny pintucks and seams (really, 1/8" felled seams, WTF?!?!), but the result is so nice!

Weirdest darts ever

There were some weird surprises along the way.  For example, a while back I noticed that these darts were topstitched, which isn't too strange.  What I didn't notice until this last weekend is that the topstitching is the only stitching in the darts.  In other words, the maker did not sew the darts first, press them to the side, and then topstitch them.  Instead, the maker folded the fabric into place as though the dart was already stitched and pressed and topstitched the whole thing in place in one go.  Weird, huh?

Just to confuse you, the antique is now on the right, and the repro on the left.
 
I was super pleased to find a vintage eyelet that was somewhat similar in design and quality to the original.  Modern eyelet just isn't anything like the antique and vintage stuff, not by a long shot.

Original on left, reproduction on the right

Wearing split crotch drawers is still something I'm on the fence about.  My first experience with them was, um, educational.  Beware sitting; if your modesty petticoat/chemise happens to get caught when you grab the back of your hoops to shift them out of the way to sit, you might get a cold, nasty surprise when your bare @ss hits the seat.

My repro in all its split crotch glory

While you can wear your chemise over this style of drawers or tucked under them, I'd recommend going with tucking the chemise in.  Not only would it help avoid the surprise cold seat mentioned above, but you avoid the problem of the long dangling ties in back...dangling...there.  Wrapping the strings around to the front wasn't a perfect solution, as they tended to shift around when I did that.  All in all, I'm more practiced at dealing with closed drawers worn a little low on the hip, so that's probably what I'll be wearing most often.  I'm still giving these a chance though!

Proof that the pattern has evolved since you last saw it.

I'm making a few minor correction to the pattern and finishing the instructions, but I should have it up within the next few days in all its gory detail.  It'll include all the tips and tricks I figured out for dealing with the crazy tiny seams, pintucks, piecing and other mad details inherent in these undies. 


The Challenge: #3 Under it All

Fabric:  Fine white cotton

Pattern:  Taken directly from an antique pair in my possession. 

Year: Late Victorian I'm guessing.  Drawers are hard to pin a date too.

Notions:  Vintage eyelet trim and a twill tape waistband.

How historically accurate is it?  Doesn't get much more accurate than this!  While nothing is going to be 100% accurate, this is really, really close.  It's an exact copy of an antique pair.  The original was sewn by machine, so machine sewing these is correct.  The eyelet is vintage, and is the same quality as the original, although not an exact replica of the design.  Every seam, dart and detail of the original drawers was pored over for hours to duplicate it exactly.  I do need a wider bit of twill tape for the waist tie, but I'll pick that up this week.

Hours to complete:  Oiy.  Forever.  I'm really not sure.  I've been examining and patterning off the antique for ages now.  Even calculating just the sewing time from start to finish is hard, because I paused to document each step in pictures and writing!  Taking all that out, probably 6 hours?

First worn:  Not worn yet!

Total cost:  Oh, I didn't keep track at all.  Not too much!

November 1, 2012

Antique Undies Up Close and Personal

So you're back to see all the teeny tiny details of someone's 100+ year old chonies eh?  Well, you're in luck.   Fair warning, this is a very picture heavy post!  You can click each photo to see it larger.

Laid flat.  Of course, it wasn't until I was writing this
that I noticed they were inside out in this photo!


Aaaand we're right side out again.  Good.


These are open crotch, straight legged drawers complete with pintucks and eyelet trim.  I picked them up from an antique store last year.  As you'll see, every seam is finished in some way or another, making these washable and durable.   They are fitted with darts and a drawstring, and tie in the back.


The most obviously pretty details are the pintucks and eyelet trim.  Both were sewn prior to stitching up the inner seam of each leg. The pintucks are each about 1/8” wide, and are sewn in two clusters of four pintucks each. Within each cluster they have about 1/8” of space showing between them. The two clusters have about ½” of space showing between them. 

Crooked pintucks!

I was happy to note that while the drawers were obviously sewn with great care and good workmanship, the pintucks are not perfectly even! I am obviously not the only person in the world that can't get those motherf***ers straight. 


The eyelet trim appears to be machine made.  Even so, it's far more perfect and beautiful than the crappy eyelet you can get at most fabric stores today.  It's slightly gathered to fit the bottom of each leg opening.  As mentioned above, the eyelet was sewn on prior to each leg being sewn up.

Inside join where eyelet meets leg

On the inside, the seam where the eyelet meets the leg is covered by a narrow strip of cotton.  This strip is cut on the straight of grain and is topstitched just 1/16" away from each edge.  The two rows of stitching are visible on the outside of the leg as well. 

Outside join where eyelet meets leg

I'm still wrapping my head around how that was done so perfectly, but anyways, moving on!


As you can see from the beginnings of my pattern here,  there are two "gussets" at the inner parts of each leg.  I can't decide exactly what to call them; if the two legs were fully sewn together rather than being open I would certainly call them gussets, but maybe they're more accurately just pieced in fabric.  The ones on the front of each leg are triangular, as seen above.


The extra bit at the back of each leg is shaped like a long, skinny trapezoid.  Each of these is sewn to the main leg using a tiny tiny felled seam.

The seam in the foreground is the outside view;
the one in the back is the inside one.


Each flat felled seam is only 1/8" wide!  As with the pintucks and trim, these "gusset-whatevers" were sewn to the leg piece while it was still flat, prior to the inner leg seam being sewn up.


Inside view of side dart

Inside view of back darts

Darts!  There are 12 darts in total on these drawers; one on each side, and five on either side of the back opening.  Each dart is about 4 1/4" long.   The back ones overlap a little; the way that they overlap tells us that the backmost one was sewn first, then the rest from back to front.  Each of the back darts is pressed towards the front; the ones at each side are pressed to the back. 


Side dart, outside view

Back darts, outside view

It's a bit hard to see in these photos, but after being pressed to the side each dart was topstitched down.  The stitching is 1/16" in from the seam of each dart. 


The inside seam of each leg is sewn up with a French seam.  Why a French seam when felled seams were used earlier?  I don't know, but perhaps it cut down on bulk in areas where multiple seams met.  In any case, as you can see above, these seams are where the only really noticeable  damage is.  French seams are not as strong as flat felled!

Front
Inside

There's a facing appled to the inner edge of each leg to finish the raw edge.  The facing was cut on the straight of grain.  It was sewn along the front edge, then turned to the back, the edge folded under and topstitched.  The photo above left is the inside of the facing, while the one on the right is how the finished edge looks from the outside.   The finished width of the facing is 1/2".


Just noticed as I'm writing this- for whatever reason, the facing was cut in two strips and the two sewn together before it was sewn to the leg as described above.  Seems like more work that way, but perhaps there wasn't a lot of fabric to begin with?


The two legs are only attached to each other for a few inches along the top edge.  They are overlapped about ½” and stitched down for about four inches. Below that, each leg is separate. 


The stitching and overlap look perfectly aligned from the front, but from the inside you can see it got a little wonky!


The waist is finished with a facing that does double duty as a casing for a drawstring. 


The facing/casing is cut on the bias, which is a good thing since all those darts give the back edge a wicked curve!  From the bit that has come loose on the end, you can see that the facing/casing is a bias strip folded in half, sewn to the right side of the drawers, then flipped to the inside and topstitched.   The ends were merely folded in; they were not stitched down.


 Up 'till today, I had assumed the drawstring was a simple cotton cord.  I hadn't bothered to even look at it.  When I finally did, I realized that it was really a length of 1/2" wide cotton twill tape!  Apparently twill tape will roll up into a cord-like shape when washed and left to its own devices. 

For those of you who made it to the end, congratulations!  You now know way too much about someone's old underwear.  If you wish to know still more, stay tuned.  I'll have a pattern and detailed instructions just as soon as I finish my next repro pair.

October 31, 2012

Stalling and Spitting

I'll have a post up showing all the pretty details of the antique drawers tomorrow.  In the meantime, here's what my first pair of repro drawers looks like behind the original-


My first attempt was made from muslin, and while it worked it was a pain in the butt to sew all the tiny details with.  I'm making a second repro pair right now with fabric that behaves better.  When that's done, I'll be able to post a step by step tutorial on how to make your own!

In the meantime, I have to deal with this-


Urgh.  My iron is on its last legs and is protesting by spitting all over everything.  Who's got recommendations for a new one?