
I started this corset last year and wore it all during Dickens Fair with no binding or trim because I never had time to complete it. I didn't even have proper laces on it until Kathleen gave me some a week or two in! Thanks to The Historical Sew Fortnightly UFO Challenge, I got this off of my pile of unfinished things. Here's the belated rundown on how it went together.
I began by custom drafting a pattern to my measurements using this free tutorial from Foundations Revealed. I heavily altered the draft by adding lots more space in the hip, plus some extra in the top back. You've got to have some place for the squish to go!
 |
| Mock up time! |
Being in a hurry, I only made one mock up. Based on that I altered my pieces slightly, mostly removing width on one pattern piece and adding it to another, and smoothing the top line out. Since I've completed this corset, I've changed the pattern yet again to correct some issues that became apparent in the finished product, but I'll point those out in a bit.

The completed corset was made with some super nice German coutil from Farthingales. It's a bit pricey, but an absolute DREAM to work with! The fabric is very thin and lightweight, but very tightly woven and strong (important in a coutil) with a very small herringbone weave. It's quite stiff, which makes it pretty easy to work with while sewing, plus gives the corset itself great support. After wearing it through the run of fair, it had molded itself to me perfectly.
 |
| Fun lining, courtesy of two quilter's fat quarters |
While this stuff is probably strong enough to make a single layer corset out of, I chose to use two layers of coutil and sandwich the bones in-between. Since I'm a fan of fun or pretty insides, I used some quilter's cotton with a nice pattern for a lining. As with most of my corsets these days, I used a laser to cut both the coutil and the lining fabrics, because I am lazy as all get out when it comes to cutting. The corset was sewn together mostly using the method described in volutelady's post about seams on the corsetmakers livejoural board. I use all sorts of methods depending on the corset I'm making, but this one worked just fine for this project.
The bones on either side of the laces and right next to the busk are all white flat steels, while the rest of the corset is boned in spiral steels. The flats keep the front and back stiff and sturdy, while the spirals allow for more pronounced curve at the hip and bust. There are a grand total of 32 bones.
 |
| My moment of DUMB. |
I was incredibly stupid while rushing through making this. For accuracy's sake, I like to draw my seam line in. However, rather than take the time to find one of the several fabric-friendly marking devices I own, I picked up the nearest ink pen and got to work. My reasoning was that it would be on the inside and no one would see. Of course, hours later my iron decided to spit up a bunch of water, soaking through the corset and wetting the ink. Long story short, the ink bleed through to the outside, and I have been kicking myself since November. Ladies and gents, learn from my example.

Aaaaand now we're caught up to today. Today was spent binding the top and bottom edges, and sewing on some vintage lace. The binding is a lovely blue silk dupioni left over from another project, and the lace was a great find at Lacis. I machine sewed the binding to the front, then handsewed it down along the inside. My hands are killing me! While the strength and tight weave of this coutil is a bonus for the structure of the corset, it is a total bitch to sew by hand.

It is at least some consolation that my skills at binding edges have greatly improved! You can also see that I'm a big fan of thin bias binding. The finished binding is only about 3/16" wide.

The lace was more of a pain to sew on than I'd thought. At first I just whipstitched it on on from the wrong side and flipped it to the outside, but it looked odd, so I ripped it out. To get it to look nice, I had to put the corset on my mannequin and carefully pin the lace in place around the curves, then tuck the excess to the inside and sew it. But finally, at 7:00pm on January 28th, it was done in time for the challenge! (I'm ignoring the fact that the lovely lady in charge of the challenge is in New Zealand, and that the day ended for her many hours ahead of me)


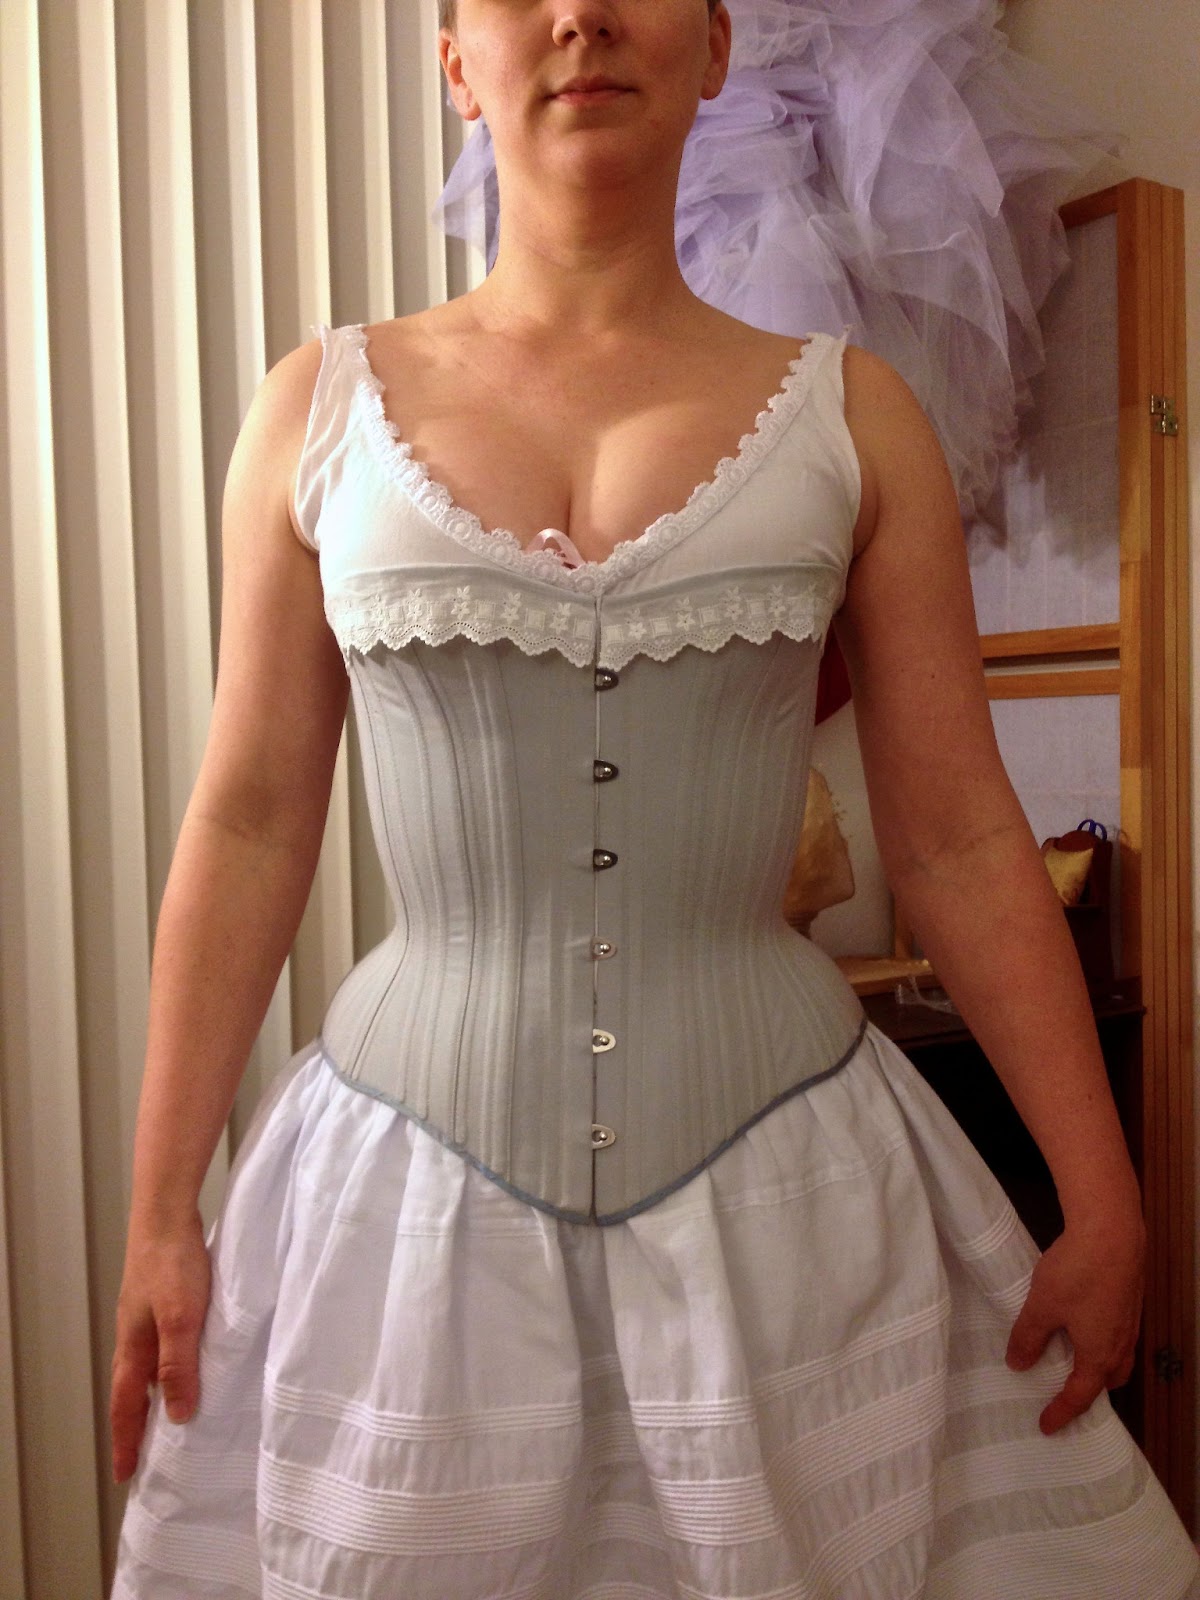
 |
| I've intentionally laced it looser at the back top to avoid overspill. The crookedness was not intentional, and was later fixed by my |
I need a little more space in the upper back, and the bit under the arm doesn't need to dip down so far. I've since made these changes to the pattern, so the next one will be better. I've also taken a bit of space out of the hip, because without a skirt to fill it in there's a little extra space there. However, I quite like the dramatic hip flare, so I may make another in the future with the same hip width just for looks.


And now for the stats:
The Challenge: #2 UFO
Fabric: Corset made from German coutil, binding from silk dupioni and the lace is vintage machine made cotton eyelet.
Pattern: Self drafted using tutorial from Foundations Revealed.
Year: eh, 1880's? It's certainly a lateish Victorian corset, but it wasn't created to be a specific year or decade.
Notions: 8 white spring steel bones, 24 spiral steel bones, one busk and a bunch of two piece grommets, and laces supplied by the dear Kathleen. I suppose the cotton eyelet could go in this category as well.
How historically accurate is it? Pretty accurate, since we can't use whalebone and such these days. I did draft it with a touch of extra space in the ribs, which may not be entirely period, but hey, most of us started corseting in our adult years rather than as girls!
Hours to complete: Not sure on the corset itself, but finishing the binding and lace for this challenge probably took about 3 to 4 hours. I meant it when I said that handsewing that stuff was the devil!
First worn: In it's partially done state it was worn for the entire run of Dickens Fair, but its first wearing when complete was tonight for photos!
Total cost: The coutil was about $34, and the busk was something like $12. I tend to keep steel boning and grommets on hand, so those were out of my stash. The quilter's cotton and blue silk were in my stash too. The lace was maybe $8. So $54, not including the cost of the items I already had on hand.
Wow! Gorgeous! I love the color.
ReplyDeleteThanks! I fell in love with the grey blue color of the coutil the minute I saw it on the Farthingales site!
DeleteIt's so beautiful! I noticed you put a lot more boning channels in yours than I did in mine, I think I'll go back and put some more in after seeing yours, especially where it buckles (my fabric choice wasn't great concerning that either). I'm sorry I cut that sexy point off in front, too, for the shorter busk, as yours looks so gorgeous and curvaceous and sexy. I have much to learn, master!!
ReplyDeleteYou did a great job on yours as well! I agree on the more bones though. More boning channels = more support, less chance of a painful buckle, and nice smoothness all around. I learned that lesson from Jenii Hampshire, aka Sparklewren, who often has an upwards of 50+ bones in hers! You should have a look at an article she wrote comparing types of boning and what effect they have - http://www.foundationsrevealed.com/articles/free/intermediate/99-experimenting-with-steel-boning-by-jenni-hampshire
DeleteIt's absolutely perfect! The shape is SO lovely.
ReplyDeleteWhat a pretty color! Lovely work! And it looks charming with the short petti. Love it!
ReplyDeleteThanks! I'm really loving the petticoat with it too :)
DeleteThanks, ever so, for this! You do such beautiful work explaining everything. I'm getting inspired to start doing some custom corsets for my actors this summer. A treat, although Im sure they won't be thrilled in the HEAT!!! Probably a stupid question, but what about spring steel and .... SWEAT? Does it rust? You probably covered this elsewhere, and I'm sorry if I missed it.
ReplyDeleteThanks,
Nancy N
I'm glad it was useful for you! :) As for rust-
DeleteWhite spring steels such as these are rust resistant because they are coated in nylon. Spiral steels such as these are made from galvanized steel which is rust resistant as well. However, spiral steels may be subject to rust where they are cut, and I do not know whether the tips used to cap them are rust resistant.
It's highly suggested to wear a chemise or modern tank top between your skin and the corset to protect it from sweat, especially b/c corsets are hard to wash! When removing the corset, spread it out somewhere where it can air dry; do not roll it up and shove it in a drawer.
I should probably more highly emphasize "rust resistant" in my comment above. The coatings can rub off over time, and chucking corsets in the washing machine is NOT recommended. However, a bit of sweat shouldn't harm them.
DeleteAmazing - always in awe of people with such creative flair.
ReplyDelete